Bypassing Apple’s Video Out protection for less than $5
Modding an unlicensed iPod dock to get Video Out from an iPod Classic
—> The PDF version of this article can be found here.
Since Apple released the iPod Classic and the iPhone, they have included a new protection mechanism to protect their hardware from being used with certain iPod docks. The protection only lets the devices work to the full extent when using Apple approved / licensed / certified hardware.
Whatever the reason has been for this lockout of older hardware, in the end it means that any dock out there that doesn’t contain the special authentication can not be used with the new iPods/iPhones.
This document describes how to bypass this protection for the iPod Classic, with spending less than $5. It contains detailed instructions to do this mod yourself, the instructions show how to do this mod on the Altec Lansing inMotion iMV712 ‘Digital mini-theater speakers for iPod’, but the same approach should apply to any other dock out there. This mod works for the iPod classic, but might also work for the iPhone with a little adjustment.
What does the protection do
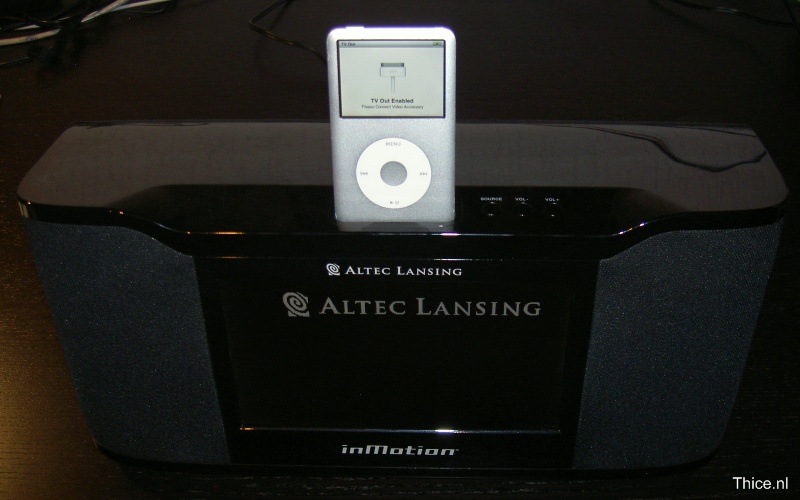
Basically what the protection does is lockout the use of the Video Out option on the iPod when connected to unsupported docking devices. The iPod/iPhone is unable to provide Video Out output to the dock, and thus the dock has nothing to show. The only thing you would see on the iPod is the “TV Out Enabled Please Connect Video Accessory†text, as seen on the picture below.
How does the protection work
The new approved / licensed / certified peripherals contain a special chip. This chip seems to be used by the iPod to check if it is allowed to send its Video Out output to this peripheral. So without the chip the iPod (and iPhone) will simply not output the video signal to the peripheral.
There is one alternative approach than described in this document to actual get Video Out on a non-authenticated dock. As soon as you start a video on an iPod and the screen shows the request for the ‘Video Accessory’, connect a Video Out cable having the authentication chip. When the video starts playing you can disconnect the cable and plug the iPod on the dock. The iPod will continue to output the video to Video Out and the video will show up on the dock.
Since the above named process works it seems that the protection only checks for the authentication chip when the video is started. As soon as the video is playing on the iPod, it will keep sending its video signal through Video Out. This probably means that the chip is an authentication chip and no encoder chip or whatsoever.
The mod described in this document works on the current latest iPod Classic software version (1.1.2).
The same solution as described in this document should apply for the protection in iPhone, however the chip used doesn’t work with the current iPhone software (version 3). With the right chip (for example from the official Apple cable) this same mod should work with the iPhone as well. At the time of writing this document I ordered some other cables to see if there is a cheap one out there with the right authentication chip, if successful I will of course post an update about that.
Various sources on the internet show that the protection on the iPhone can also be bypassed when the device is jailbroken and patched against the authentication. This information can be found elsewhere on the internet and is not part of this document.
Why this mod
I actually bought my Altec Lansing dock before there was much information on this lockout. Not being able to use the Video Out option was very frustrating, my pretty expensive video dock was not much more than a normal audio dock this way. Only after searching on the internet why my Video Out didn’t work I found some other frustrated users with the same problem and after a while information became available on the lockout. In the end there was no solution other than to buy another expensive dock and no longer being able to use this dock. I did not buy a new dock and decided to use this one as an audio dock since there wasn’t really another option.
I thought about trying to circumvent the security as soon as I heard about the lockout and came up with this mod more than a year ago, but actually never took the time to really work it out, now I did.
Since all the information in this document is gathered from the internet or analyzed by myself it could be that there are some errors in this document, I am sorry if that is the case. Any opinion expressed in this document is solely my own.
Enjoy it!
Thijs Bosschert
![]()
Modding instructions
The cable
The cable that was used for the mod can be bought online at DealExtreme (the author is in no way affiliated with DealExtreme). At the time of writing this document the costs are only $4.25 including shipping. There are probably a lot of cables that can be used for the mod, but this one works for sure.
The cable can be bought using the following link: http://www.dealextreme.com/details.dx/sku.24871
And the cable looks like this:
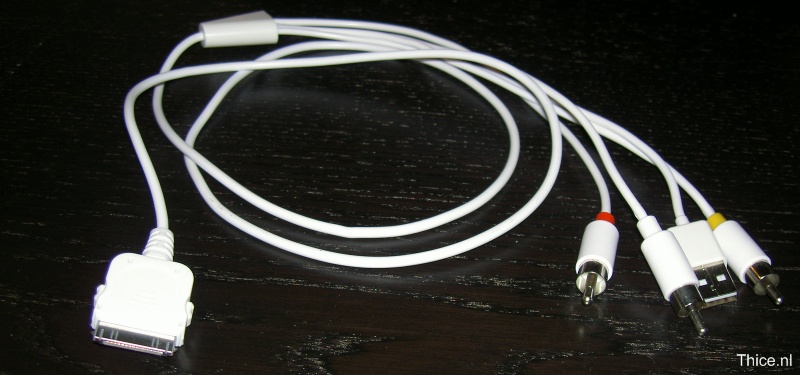
Like seen on the picture, the cable contains audio and video connectors as well as a USB plug. But what is more important is that it contains the authentication chip. This chip can be found when the casing of the iPod plug has been removed. The casing can be removed quite easily.
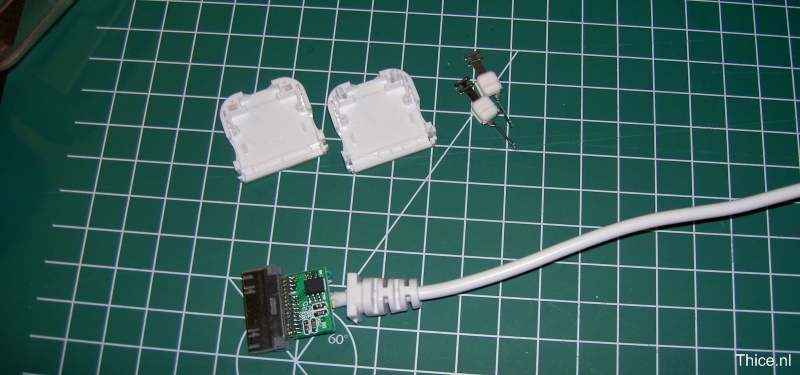
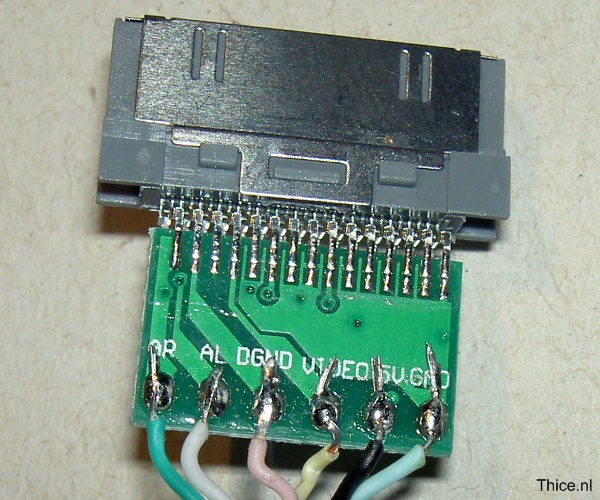
When we zoom in on the connector we see a very plain PCB (Printed Circuit Board, the green board with the electronic components) with just 6 wires connected. These are the wires to the different connectors on the cable. We will remove these wires from the PCB.
On the other side of the PCB we can see the chip we are looking for. The chip is blank, so no information on the chip there. We can see that it has 6 soldered legs, and two unsoldered ones. Also on this side the PCB is pretty basic with just a few components.
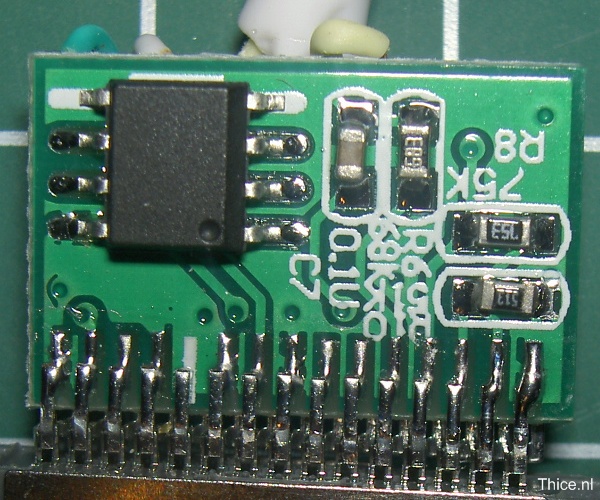
Authentication chip
After finding the authentication chip I analyzed which pin of the authentication chip was connected to which pin of the dock connector. The pin connections can be found in the table below.
The information on the pins from the Apple iPod dock connector can be found on the pinout.ru website.

| Chip pin | Apple connector pin | Purpose |
| 1 | 18 | 3.3V |
| 2 | – | NC |
| 3 | – | NC |
| 4 | – | NC |
| 5 | – | NC |
| 6 | 13 | Rx |
| 7 | 12 | Tx |
| 8 | GND | GND |
The picture of the chip below shows which pin is used for which purpose:
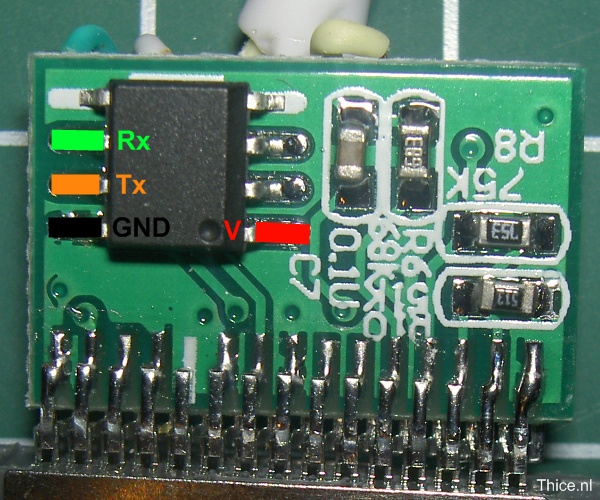
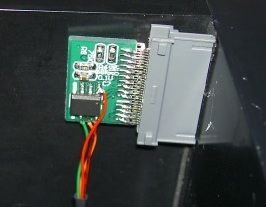
I decided to keep the authentication chip on the connector PCB for the sturdiness of it, as well as being able to more easily build it back into a cable might I want to.
I attached wires to the four above named connection points on the authentication chip, I used four different colours of wire to be able to distinguish between the different chip pins.
| Chip pin | Wire color | Purpose |
| 1 | Red | 3.3V |
| 6 | Green | Rx |
| 7 | Orange | Tx |
| 8 | GND | GND |
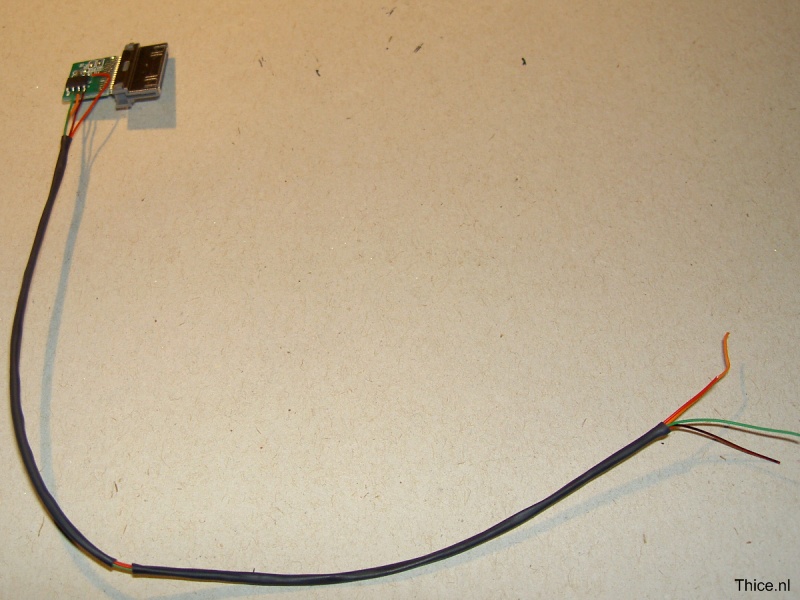
Long wires were used to be able to place the chip on another location than close to the dock connector.
Building the chip in a dock
The following instructions show how to build the chip in the Altec Lansing inMotion iMV712 iPod dock, however the same approach should apply to any other iPod/iPhone dock out there.
To be able to build the chip in our example dock we first need to open the dock up. With the Altec Lansing dock this takes quite some effort. The dock has a lot of screws and some of them in really hard to reach places. The pictures below show where the screws are located and how we can reach the dock connector which we need for this mod. First start by removing the 11 screws in these locations on the bottom of the device:
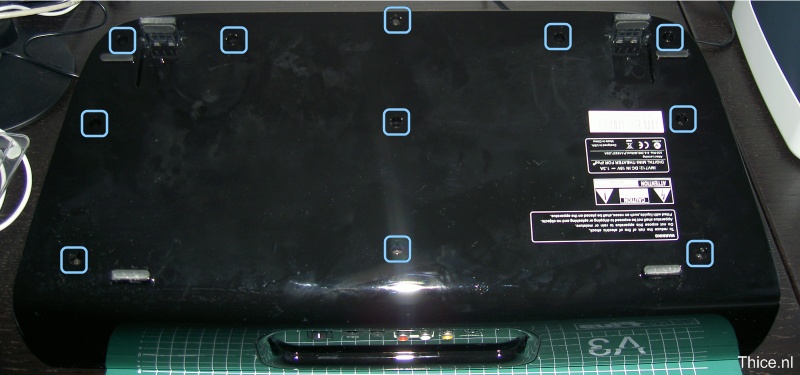
After the 11 screws are removed you can remove the bottom part of the case. With that part of the case removed you can remove the next 11 screws on it. Some of the locations of the screws might not be clear on the picture but will be clear when you open the dock.
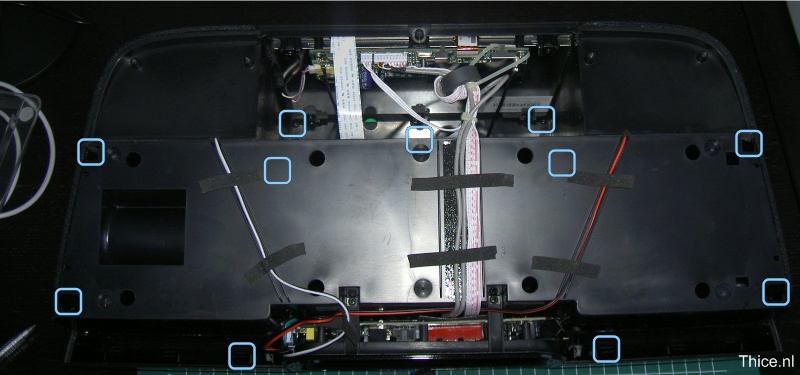
To be able to reach some of the screws on this dock (especially the ones on the side) you will need quite a long (and narrow) screwdriver. You can see the solution I used and the length needed below.

After removing the second 11 screws you can lift up the top cover, be careful here, because the dock connector is connected to the top cover. You can disconnect the dock connector by removing the three screws and plug show below.
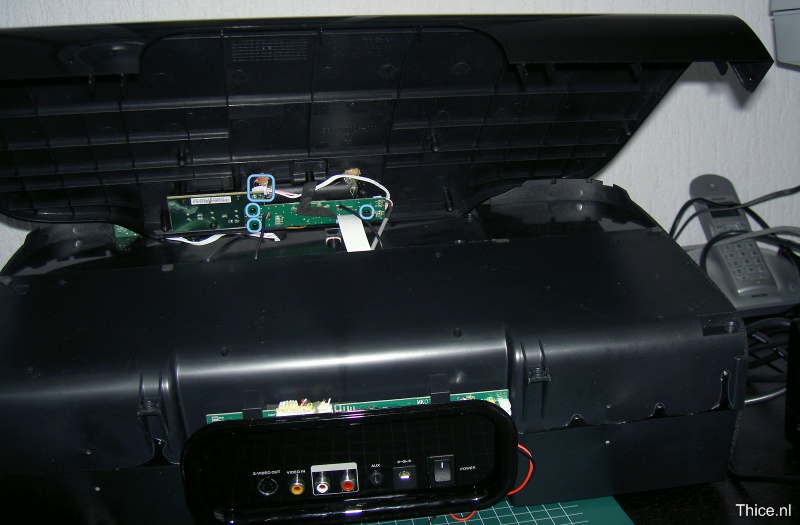
After disconnecting the dock connector PCB from the top cover we can access the actual dock connector. The small PCB containing the dock connector can be seen below.

Pin locations
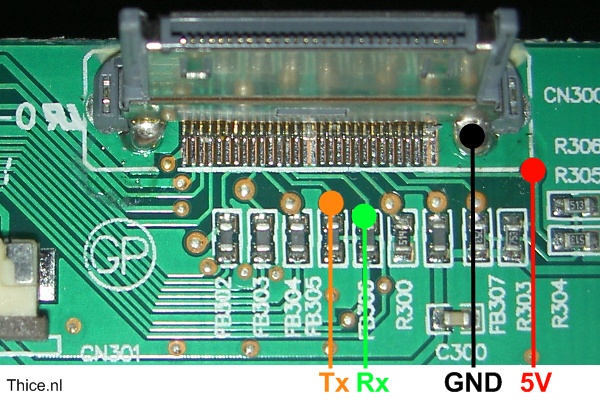
The following picture shows the locations of the pins on the dock connector that are connected to the authentication chip.
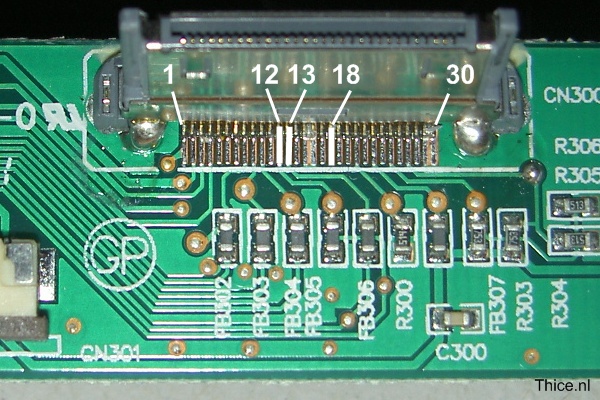
Because the solder pads of the pins are really small I looked for some alternative locations to solder the wires to. For the 3.3V connection I found an alternative point that is 5V, which does work with the chip that was used. The locations of the solder points can be found on the following picture:
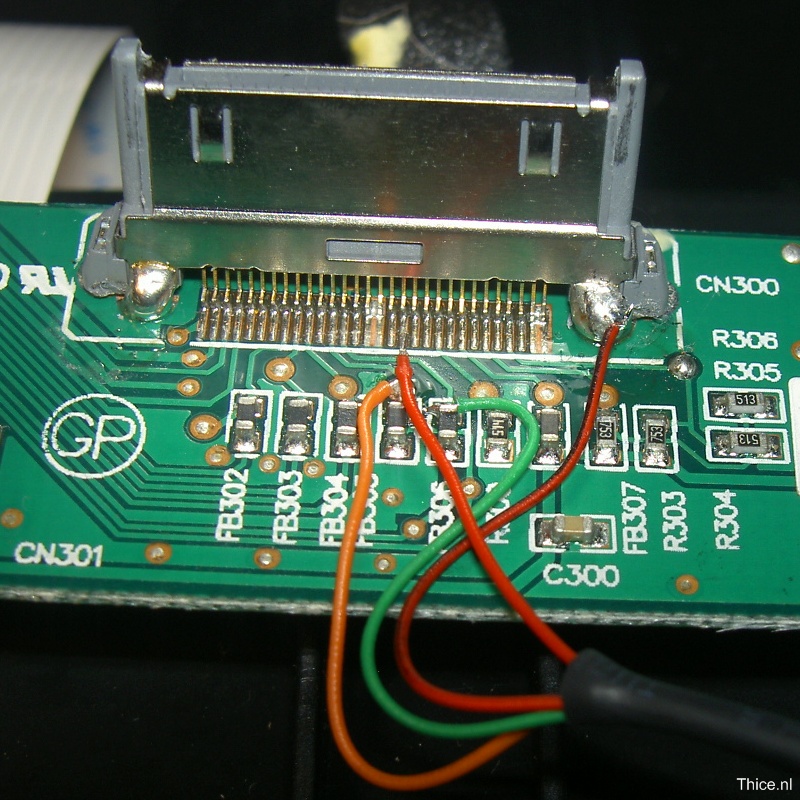
Soldering the wires
The first setup I made was with pin 1 of the authentication chip connected to pin 18 of the dock connector. This connection is 3.3V.
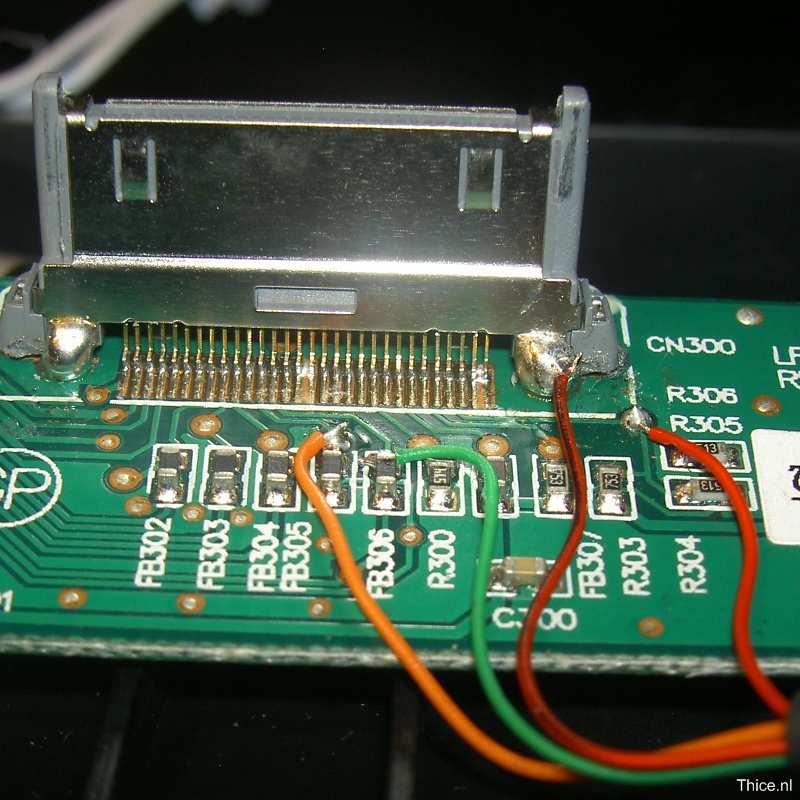
Since the 3.3V connection on pin 18 was really fragile I searched for an alternative location to solder the wire to. I found the previously named 5V location close to the dock connector.
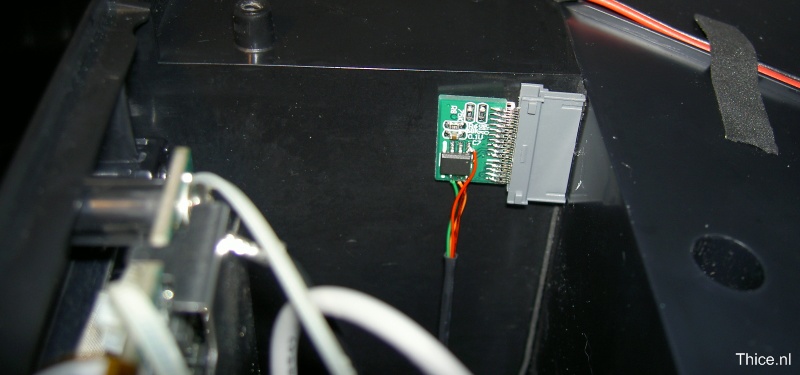
End result
Since I connected the authentication chip using long wires, I could place the chip on a location away from the dock connector. I placed the chip on the other side of the dock close to the bottom, so I ‘only’ have to remove the bottom 11 screws when I want to tamper with the chip, for example when I want to try a chip that should work on the iPhone.
It Works!
After putting it all back together (just follow all the previous information in the opposite direction) I found out that the mod actually works like a charm.
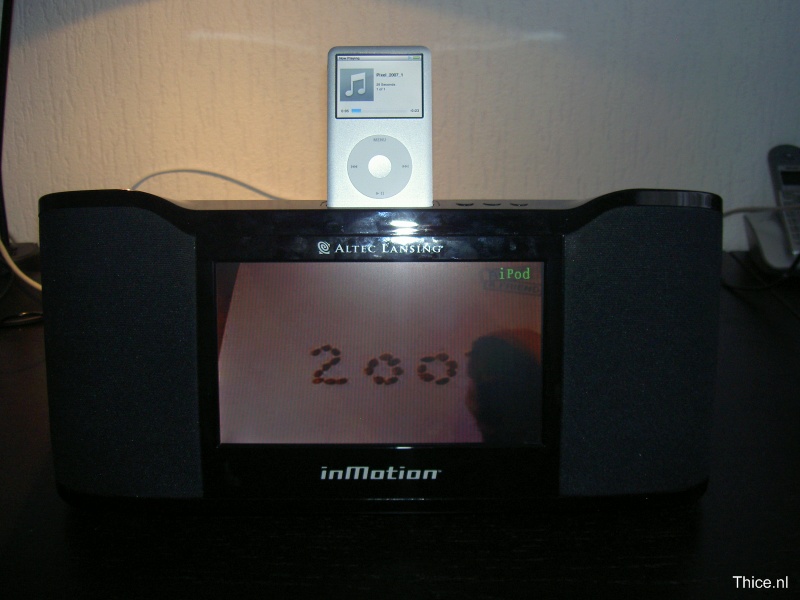
When we start a video on the iPod now it will start playing on the dock right away. The mod has worked and the dock can be used again to show your videos of your cute hamster.
Due to a change in the website the comments can be found here: http://www.thice.nl/?page_id=2#comments