iPod dock adapter for the Motorola Droid/Milestone
—> The PDF version of this article can be found here.
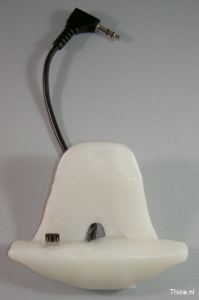 Manufacturers of electronic devices don’t seem to be able to get a global standard on docking connectors, resulting in that you usually end up buying a new dock for every electronic device you acquire. In the past I bought multiple iPod docks (also see my other article about bypassing the Apple video out protection on older docks here), but I own more devices than just the ones from Apple. My current mobile phone is a Motorola Milestone (or Droid if you are from the US), which of course does not fit on an iPod dock. Not willing to buy new docks I decided to build an adapter to enable me to use my iPod docks with my mobile phone. This article will describe step-by-step how I have built this dock adapter.
Because I am from Europe (the Netherlands to be precise) my Motorola device is named a Milestone, but the whole article of course is just as applicable to the Motorola Droid. For the ease of use I will just refer to the ‘Motorola Milestone’ in this article from now on.
Since all the information in this document is gathered from the internet or analyzed by myself it could be that there are some errors in this document, I am sorry if that is the case. Any opinion expressed in this document is solely my own.
Goals
The goal of this project is to create a dock adapter which enables the Motorola Milestone to charge, output music and switch to docking (multimedia) mode. The Motorola Milestone charges through the micro USB connector on its side. To enable charging through our dock adapter we will need to equip it with a micro USB connector.
Since the Motorola Milestone does not provide audio output through the micro USB connector, we will have to use the headphone connector on the top of the device to enable audio out.
To enable automatic switching to docking mode on the Motorola Milestone the device is equipped with a magnetic sensor. When a magnet is placed against a certain location on the device it will recognize the dock type (Media or Car) by the polarization of the magnet. With some testing I found the best location for the magnet is at the back of the device above the micro USB connector and a bit to the right. This location is shown on the picture below which shows the back of the Motorola Milestone.
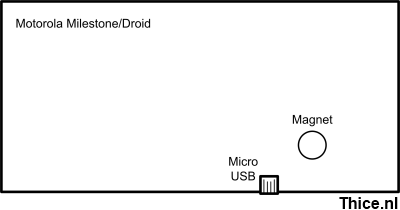 Using a magnet in our dock adapter will enable us to use the multimedia docking mode.
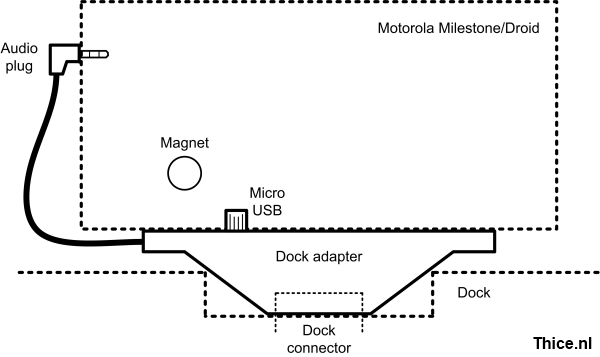
So, our dock connector will need to have a micro USB and audio connector as well as a magnet in it. The last part to enable us to connect it to the iPod dock will of course be a connector which fits the iPod dock itself. The schematic design for the dock adapter is shown in the next image.
Parts
This chapter will list all the parts that are needed to create the dock adapter. The specific parts used in this document might not be the most obvious, but they were cheap and available at the time of executing this project.
iPod dock connector
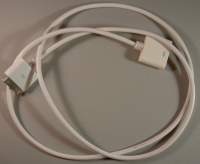 Since good dock connectors seem to be quite expensive and hard to find, I decided to buy a cheap Dock extender cable and harvest the connector from that. The Dock extender cable has been bought from DealExtreme for just $3.14:
Dock Extender Male/Female Cable for All iPod/iPhone 2G/3G
http://www.dealextreme.com/details.dx/sku.21892
The dock connector from this cable has almost all the pins available to make use of and provides nice solder pads to connect wires to. Since this is not always the case it is good to keep this in mind when looking for a suitable dock connector.
3,5 mm stereo audio plug
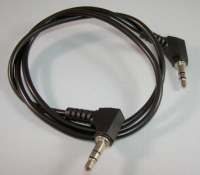 The audio cable I used in this project was one I had lying around. It suited this project fine since it had an angled jack connector, which I preferred. An alternative cable could be bought from DealExtreme for just $1.80:
3.5mm Male to 3.5mm + 2.5mm Audio Male Audio Cable
http://www.dealextreme.com/details.dx/sku.39763
Of course any 3,5 mm stereo audio plug will be fine.
.
Micro USB connector
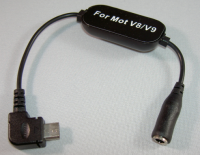 The Micro USB connector I used in this project has been harvested from a headphone adapter for another Motorola device. I bought this connector with the hope it would enable audio out from the micro USB port of the Motorola Milestone (which it of course did not). This adapter has been bought from DealExtreme for just $2.27:
3.5mm Stereo Audio Headphone Adapter For Motorola V8/V9
http://www.dealextreme.com/details.dx/sku.30099
Of course any micro USB connector will be fine.
Magnets
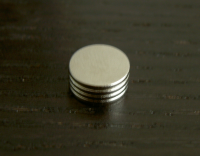 To enable the docking mode on the Motorola Milestone we will need some magnets, the following magnets from DealExtreme will suit our needs just fine for only $2.09:
Super-Strong Rare-Earth RE Magnets (10-Pack 9 mm)
http://www.dealextreme.com/details.dx/sku.3461
I ended up using four out of the ten magnets.
.
Polymorph
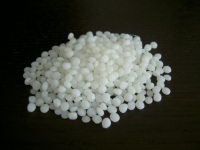 To create the encasing of the dock adapter we will use Polymorph, which is a polymer that can easily be moulded when heated at moderate temperatures. Polymorph is great stuff for prototyping and can be remoulded time after time. I bought my Polymorph from eBay, but it can be found at various places online. Some more info can be found on the website of the company I bought it from:
http://www.c-d-c-shop.com/polymorph.htm
.
.
Pin outs
Before we can start to build the dock we will need the pinouts of the various components. This chapter will show the pinouts for all the components used.
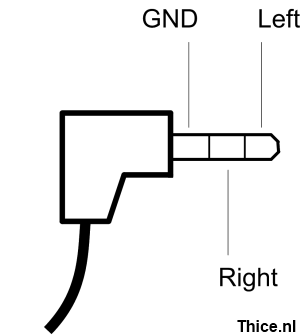
3,5mm stereo audio plug pinout
The following image shows the pinout of the 3,5mm stereo audio plug
The pinout for the 3,5mm stereo audio plug can also be found online at:
- http://pinouts.ru/Home/Tele35s_pinout.shtml
Micro USB pinout
The following image shows the pinout of the micro USB plug from the Motorola Milestone side, not the cable side. The cable side is the same pinout in opposite direction.
The pinout for the micro USB connector can also be found online at:
- http://pinoutsguide.com/CellularPhones-Nokia/micro_usb_connector_pinout.shtml
Dock connector pinout
The following image shows the pinout of the Apple iPod dock connector on the board we will be using to create our adapter.
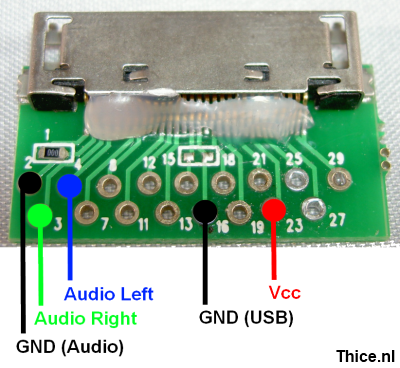
The pinout for the iPod dock connector can also be found online at:
- http://pinouts.ru/PortableDevices/ipod_pinout.shtml
Wiring
Now that we have all the pinouts for the components we can now see how we should wire the components together. The table below shows which pins should be connected together.
| Component | Connector | Wire colour | Connected to |
| 3,5 mm stereo | GND (audio) | Metal | Dock 2 |
| Audio right | Red | Dock 3 | |
| Audio left | White | Dock 4 | |
| Micro USB | GND (USB) | Copper | Dock 16 |
| Vcc | Red | Dock 23 | |
| Data – | Green – Blue | Data + |
The colours mentioned in the table refer to the wire colours of the components named in this article, when using other components these wire colours will probably be different.
To enable the Motorola Milestone to accept the power on the USB port, the USB Data- and Data+ connections should be linked to each other. Without these points connected the device will not charge.
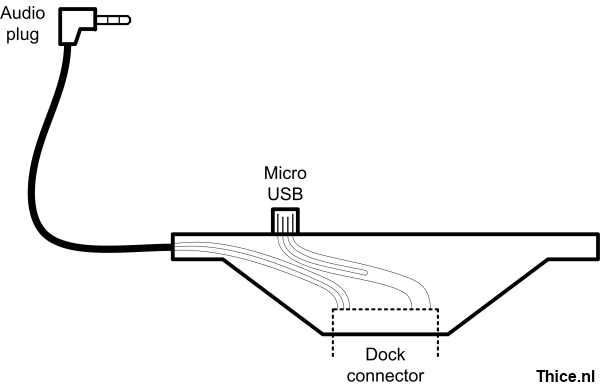
The following image shows the wiring inside our dock adapter.
Building the adapter
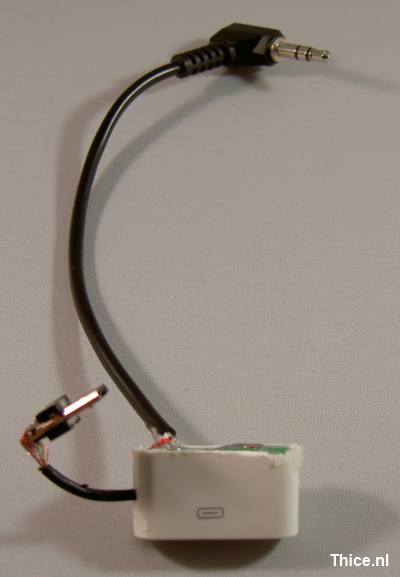
Having the different components, the design and the wiring schematics, it is now time to actually build the adapter. After soldering the components together I shortened the original dock encasing a bit because it was larger than needed. To hold everything together I filled the dock encasing with hot glue, resulting in the prototype shown below.
Polymorph encasing
The prototype showed above already works as a dock adapter however it does not hold the Motorola Milestone in its place. To build an encasing for the dock adapter that holds the Motorola Milestone in its place we will be using Polymorph.
Polymorph consists of small plastic pellets which can be melted in hot water. My general approach is to melt the pellets in hot water, press them together and making small sheets of plastic of it. These plastic sheets can be cut with scissors to preferred sizes. I personally like to use a hot air gun to melt these sheets again and then use them in the project. The encasing of the adapter has been made of multiple layers of Polymorph which have been melted together. The encasing also holds the magnets for the docking mode option.
Result
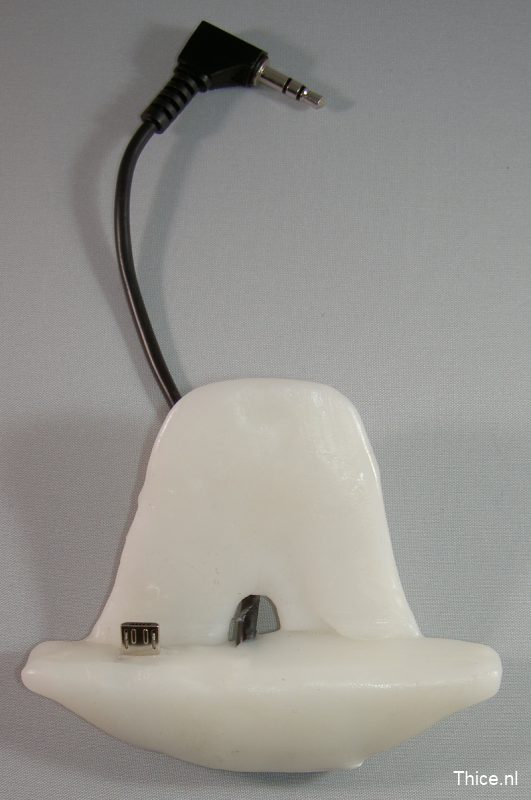
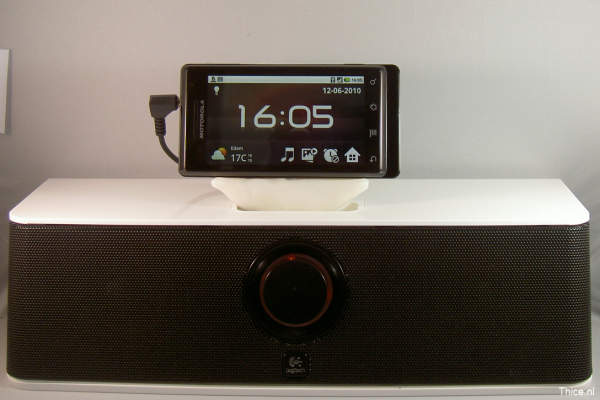
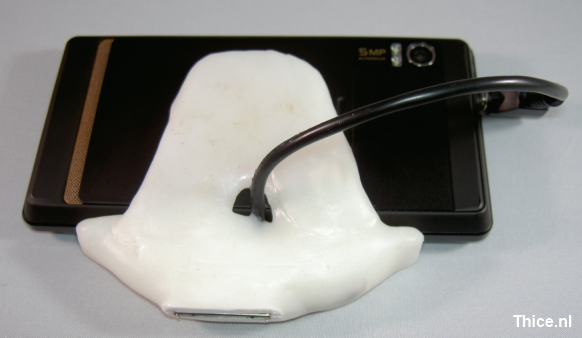
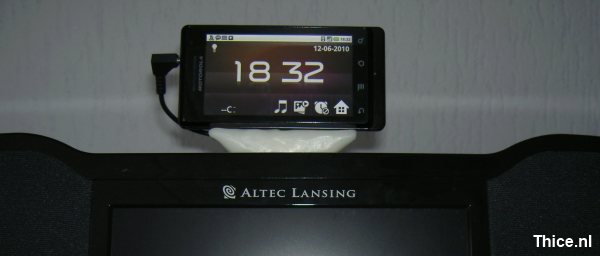
The following images show the end result of our Motorola Milestone iPod dock adapter.
When the Motorola Milestone is connected to the adapter it will go into multimedia docking mode right away and start charging. After connecting the audio cable to the headphone connector it will output its audio to the dock as well. The Motorola Milestone is standing solid on the adapter and works great.
This article showed how to build an iPod dock adapter for the Motorola Milestone, however this information can easily be used to create adapters for other devices as well. If anyone is going to build a similar adapter for the Motorola Milestone or another device, I am for sure interested to know about it.
The adapter that I have built might not be the quality of an official one, but it is of course a prototype and it works pretty well. It probably is not going to happen, but I would really appreciate if any company out there would just build and sell adapters like this.
Thijs (Thice) Bosschert
http://www.thice.nl
![]()

Leave a Reply