Repair a broken HP LaserJet printer by baking it
After my HP printer died just after his warranty period I searched for a solution what to do to revive it. When reported to HP they wanted to charge €350 to repair the printer, which is around the same amount a new printer would cost, besides that I had to ship to whole bulky printer to them. When searching the internet for an alternative you will find a lot of people with the same problem using this printer series but not a lot of clear solutions.
This write-up will describe a way to repair the HP LaserJet M1522 series printer. While this idea is not new I wanted to create an easy to follow overview to repair this printer instead of a “just bake the formatter board”. I hope this write-up will be handy for some of the people out there with the same problem. While this write-up is focusing on the HP LaserJet M1522 MFP printer I would expect the same approach to work on other faulty hardware.
The problem with the HP LaserJet M1522 printer series seems to be a faulty formatter board. Since this problem exists in a lot of units you would expect HP to take care of this and have their people informed about the problems with this unit. However when contacting HP they will quite likely have no idea what is wrong with the unit, at least that was my experience.
The symptoms of a faulty formatter board are among the following:
- The printer seems to turn off completely out of itself
- The printer hangs when booting up
- The printer needs a couple of resets before it will boot correctly
- The printer won’t turn on anymore at all
Usually the problems with the formatter board will get worse over time until the moment the printer won’t do anything at all anymore. The display of the printer will probably display the messages “Initializing…” and “Hewlett-Packard >>>>>” while is hanging during the boot cycle:
The problems with the formatter board seem to be caused by bad solder connections, so the way we are going to fix this is by ‘baking’ the formatter board. This write-up will take you through the steps you need to take to fix the printer by baking the formatter board. The only downside to this approach is that this fix only lasted for 6 months for me after which I had to bake the formatter board again.
DISCLAIMER: This write-up is just for your information, I am not responsible for what you do with your printer. Keep in mind that this is Fringe-IT and that in doubt you should just buy a new printer and leave projects like this to people who have an idea about what they are doing.
Instructions
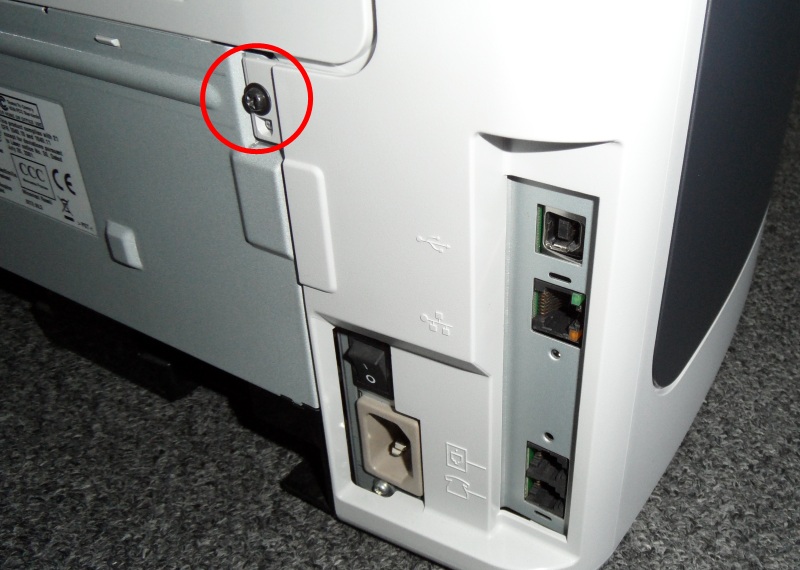
Find the screw located at the right side of the back of the printer as shown in the picture below. This screw is the only one we need to unscrew to be able to take the left side of the printer off, so lets remove it.
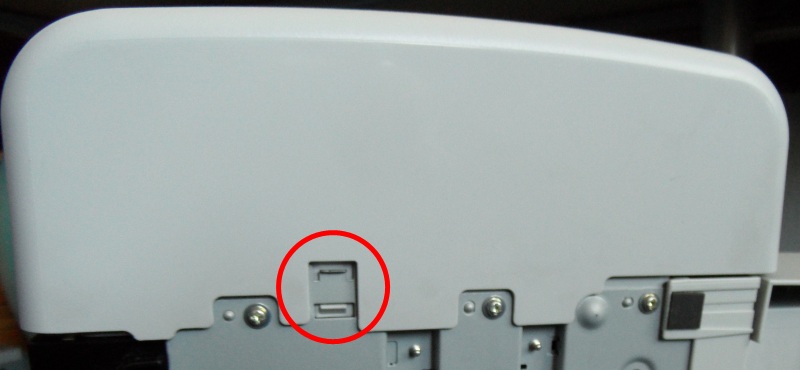
After removing the screw we can pop open the side panel, however there is a small latch at the bottom of the printer which you need to press for an easy release. See the picture below for the small latch.
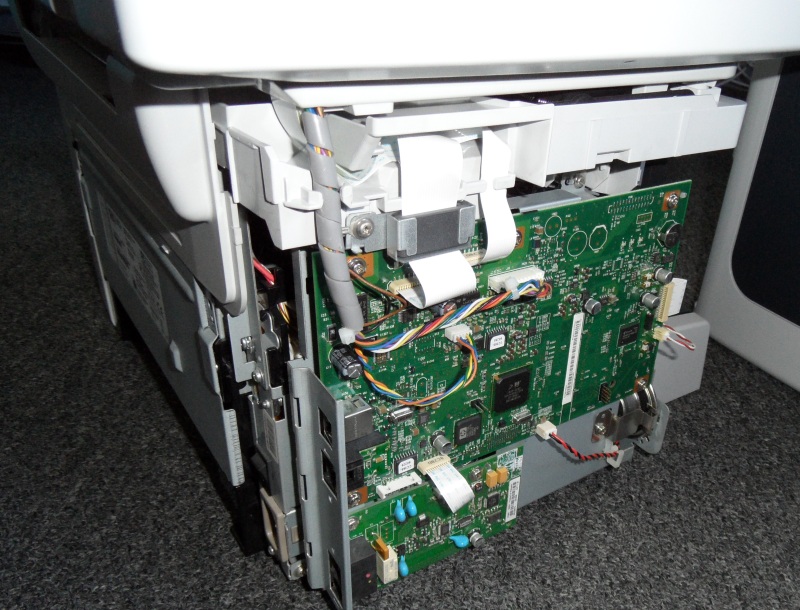
After popping off the side panel we can already see the fomatter board, we see two boards and the bigger one on top is the formatter:
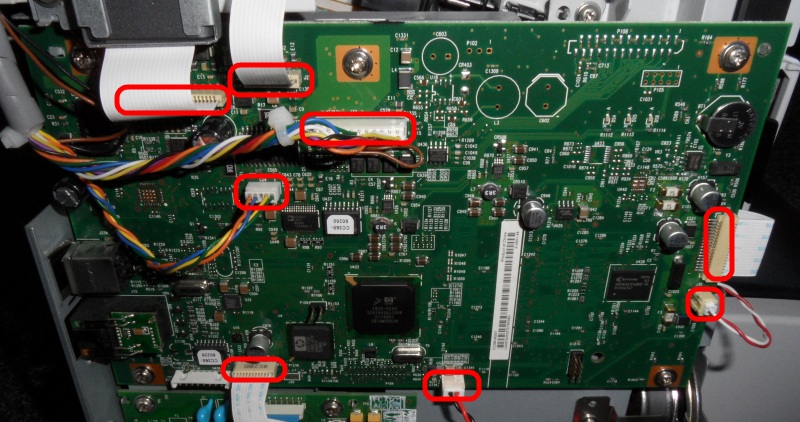
Since we need to work on this formatter we will have to get it disconnected from the rest of the printer. The first thing to do is to disconnect all the ribbons and connectors shown in the picture below.
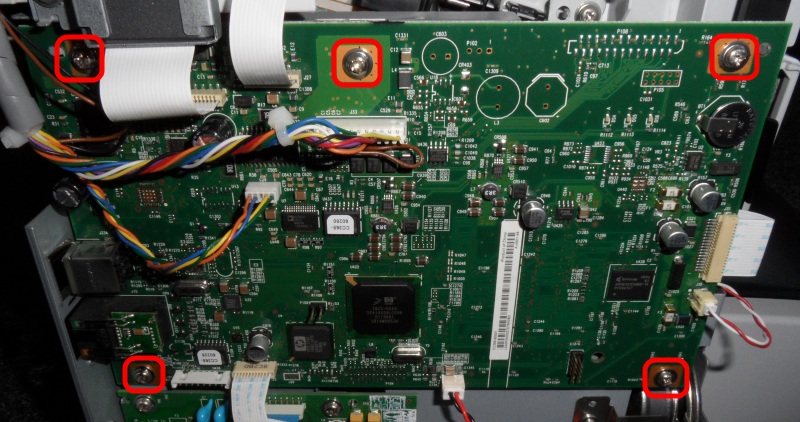
After disconnecting all connections from above it is time to remove the five screws holding the formatter board in its place:
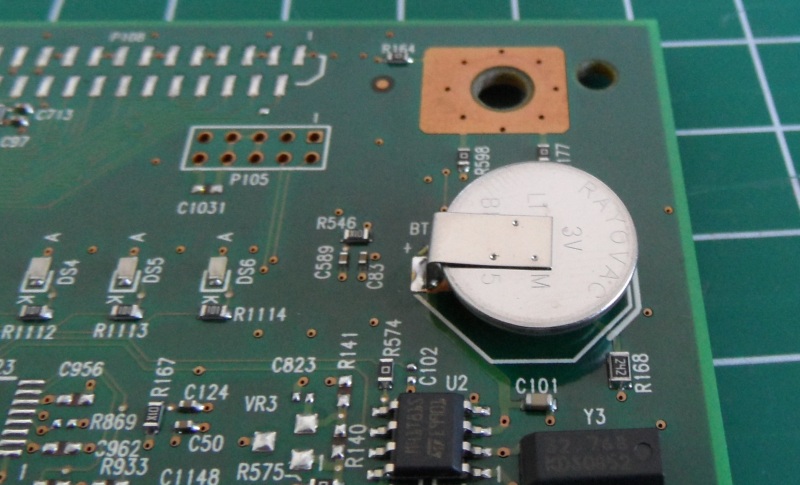
After removing the 5 screws the formatter board can easily be taken out of the printer. Before we can bake the formatter board we should remove the on-board battery from it. It is quite likely the battery won’t take the heat from the baking so well. The battery is located in the top right corner of the formatter board as can be seen below. Pay attention to its orientation, you probably do not want to connect it back the wrong way around.
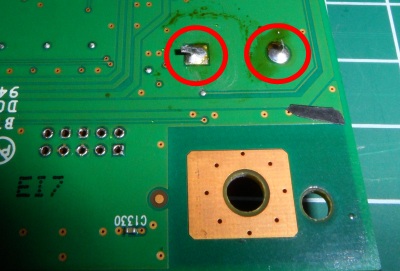
When turning the formatter board over you can see the two solder connections of the battery. The easiest way to desolder the battery is by heating the solder and sucking it away with a solder sucker.
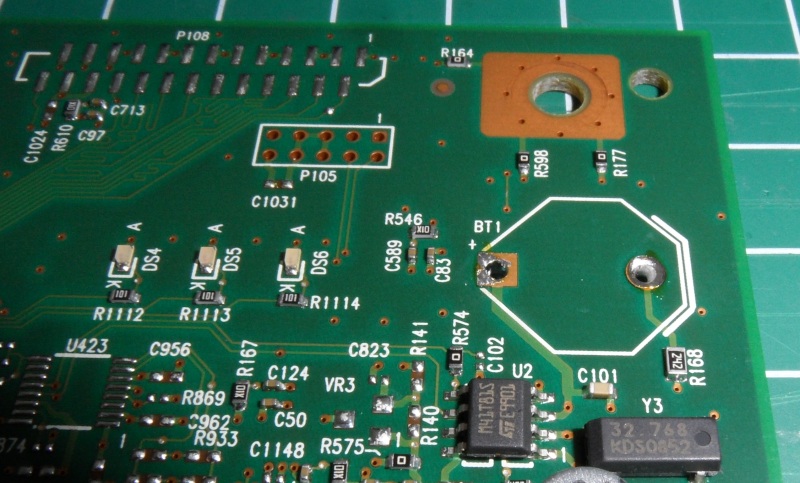
After removing the battery the board is almost ready to be put in to the oven.
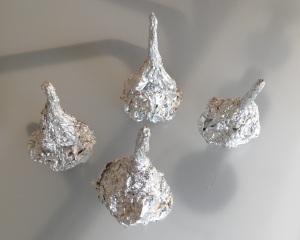
Because we don’t want to have the formatter board touching any part of the oven we will create some small stands for it to stand on. The easiest way to do this is to get some tinfoil and create small stands like shown on the picture below.
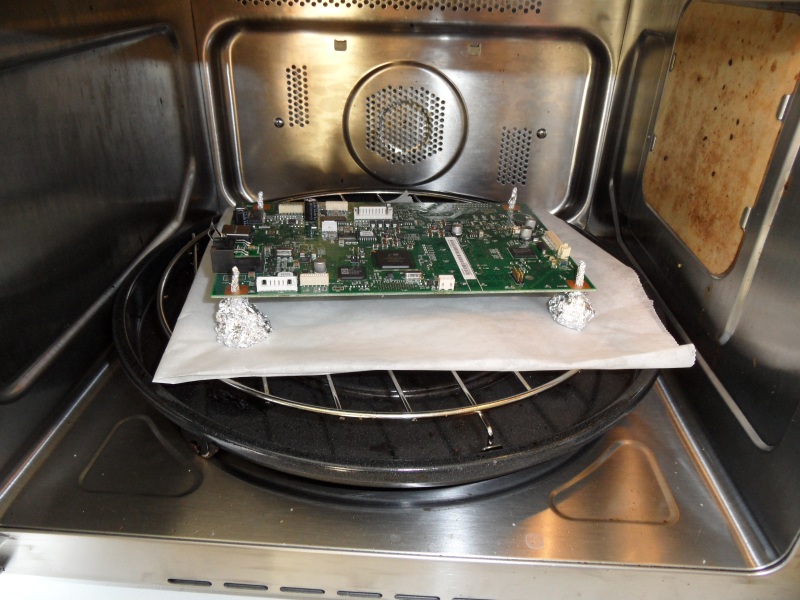
The tinfoil stands are pushed through the holes of the screws of the formatter board and after this the board is ready to be put inside the oven.
Make sure that the formatter board is not touching any part of the oven, this might cause overheating or melting certain parts of the formatter board.
We should pre-heat the oven on 180 degrees Celsius (about 350 degrees Fahrenheit) 200 degrees Celsius (about 400 degrees Fahrenheit) Update: Julius Rahmandar commented that the temperature should be a bit higher (from 180°C to 200°C) and this indeed seems to work a bit better. After popping the formatter board in the oven it is time to ‘bake’ it for 8 minutes (also on 200 degrees Celsius). Of course instead of baking the board you could probably also pop it in to the microwave for a short moment, but I would advise against that 😉
After these 8 minutes we should let the formatter board cool down for a while, be warned that the formatter board will be quite hot. After the formatter board has cooled down it is time to read this write-up backwards and follow all the steps to put the printer back together. So, remove the tinfoil stands, solder back the battery, screw the formatter board back in to the printer, reconnect all the wires and ribbons and put the casing back.
Turn on your printer and if you are lucky it should be working again!
Some of the sources I used and more information:
- http://www.youtube.com/watch?v=YOZ28QamZvo
- http://www.fixyourownprinter.com/forums/laser/48992#88
- http://h30499.www3.hp.com/t5/Multifunction-and-All-in-One/HP-LaserJet-M1522nf-freezes-up-nothing-responds/m-p/1155838
The official formatter board part number is: CC368-60001
A guide for the HP LaserJet P2015dn:Â https://www.xltoolbox.net/blog/2013/11/fixing-laserjet-network-connectivity.html
Update 2016: The fix only works for a couple of months before you have to bake the formatter board again. During my last re-bake of the formatter board I encountered a different error, which I thought was linked to the formatter board issue (but was not). The printer would only show “install black cartridge” even though it was present in the printer. The printer further would make a different sound while starting up (it would not make one of the first “rolling sounds” when booting). After fumbling around with the cartridge for a while I found out that there simply was some paper stuck in the printer, after removing this piece of paper the whole issue was gone. Since I found that multiple people encountered the exact same issue I decided to add that info here as well. I guess the confusing “install black cartridge” error is shown instead of a normal paper-jam error message.


Leave a Reply